AWS Cognito
Prerequisites
Setup
Create a new user pool
1. Navigate to the AWS Cognito console.
2. Click on the "Create user pool" button.
3. Click on the "Machine-to-machine application" application type.
4. Enter a name for the application (e.g., Biza HaaS Data Adapter NonProduction).
5. Click on the "Create" button.
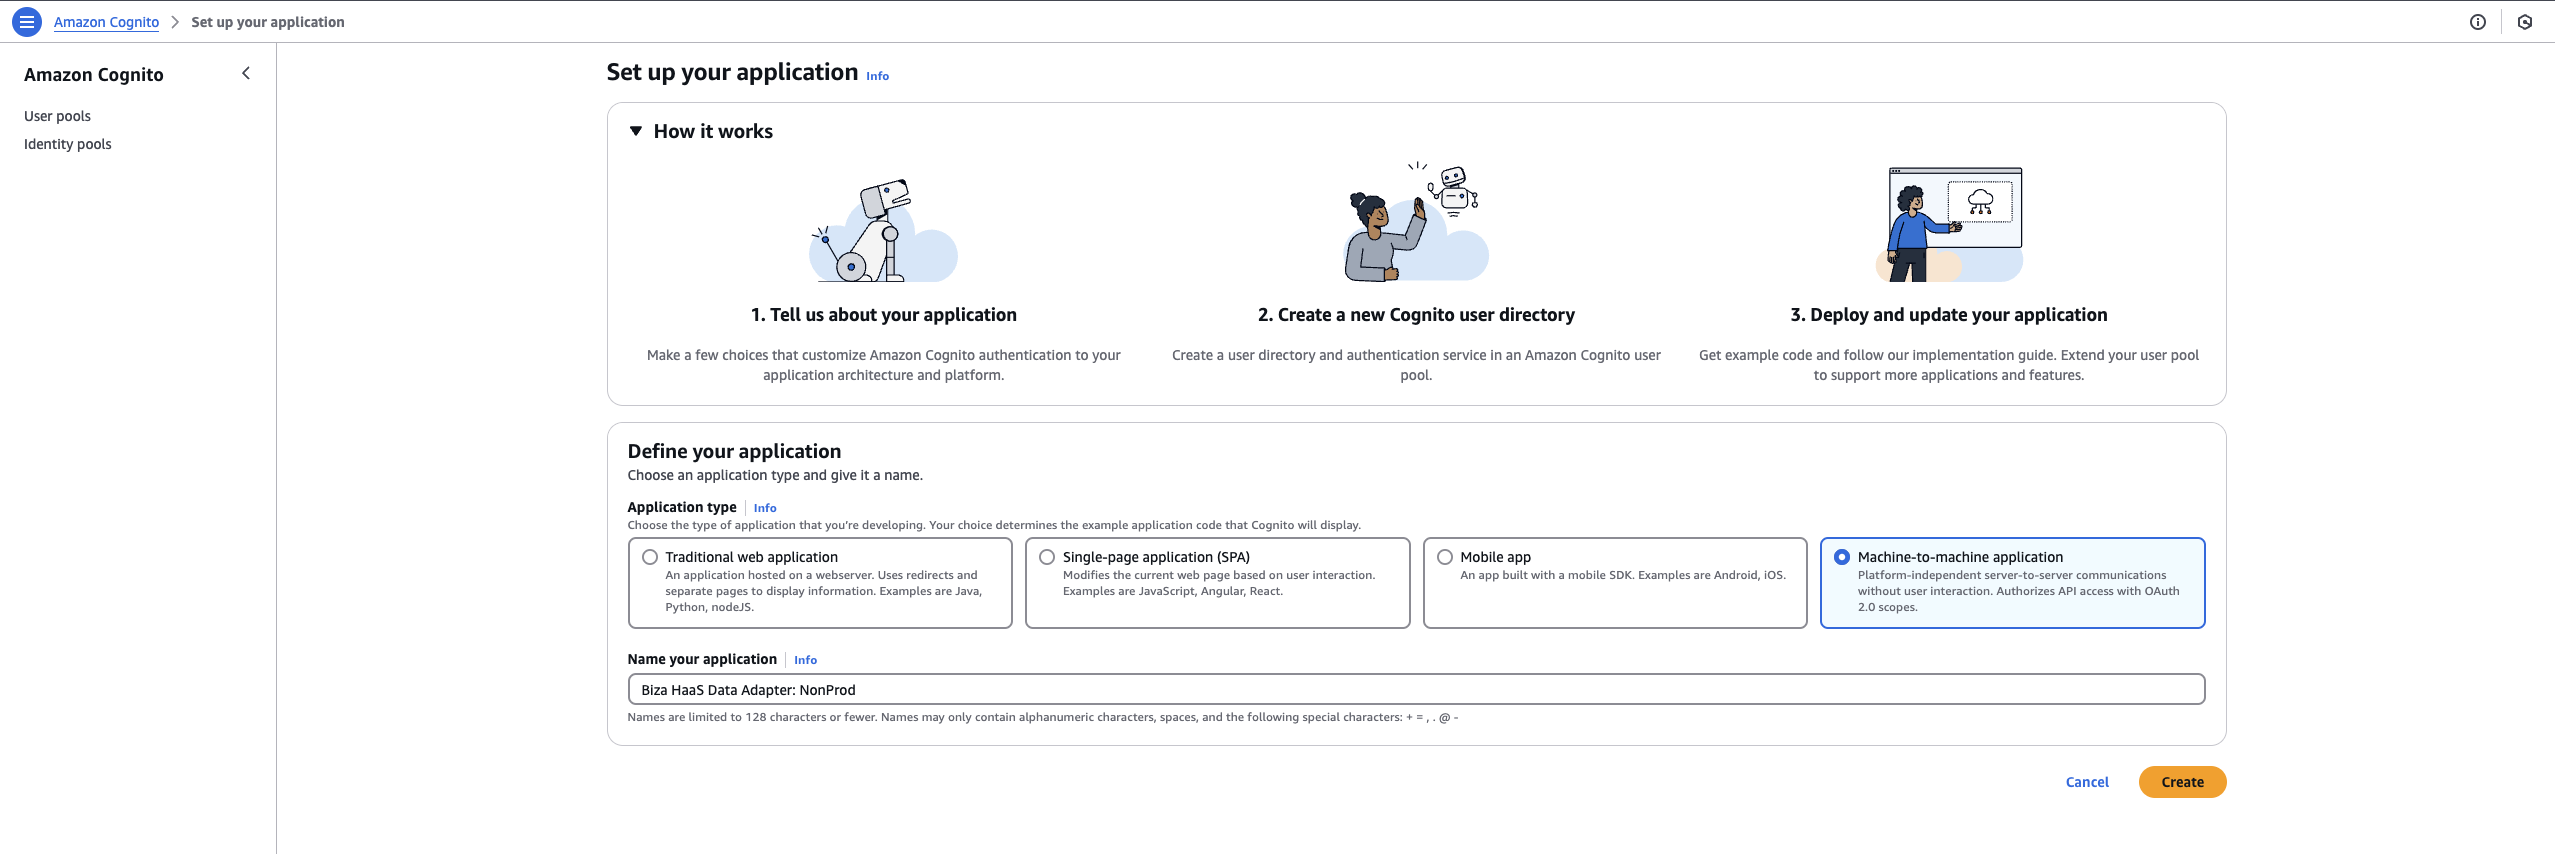
Create Application/User Pool
Collect Issuer Details
6. Click on the "Go to overview" button to view the created user pool.
7. Note down the Token signing key URL from the user pool but leave out the .well-known/jwks.json part. This is your OAuth Issuer URL.
8. You might want to change the name of the user pool to something more descriptive after this process (e.g., Biza HaaS Data Adapter NonProduction) since it will have a default name of User pool - xxxxx.
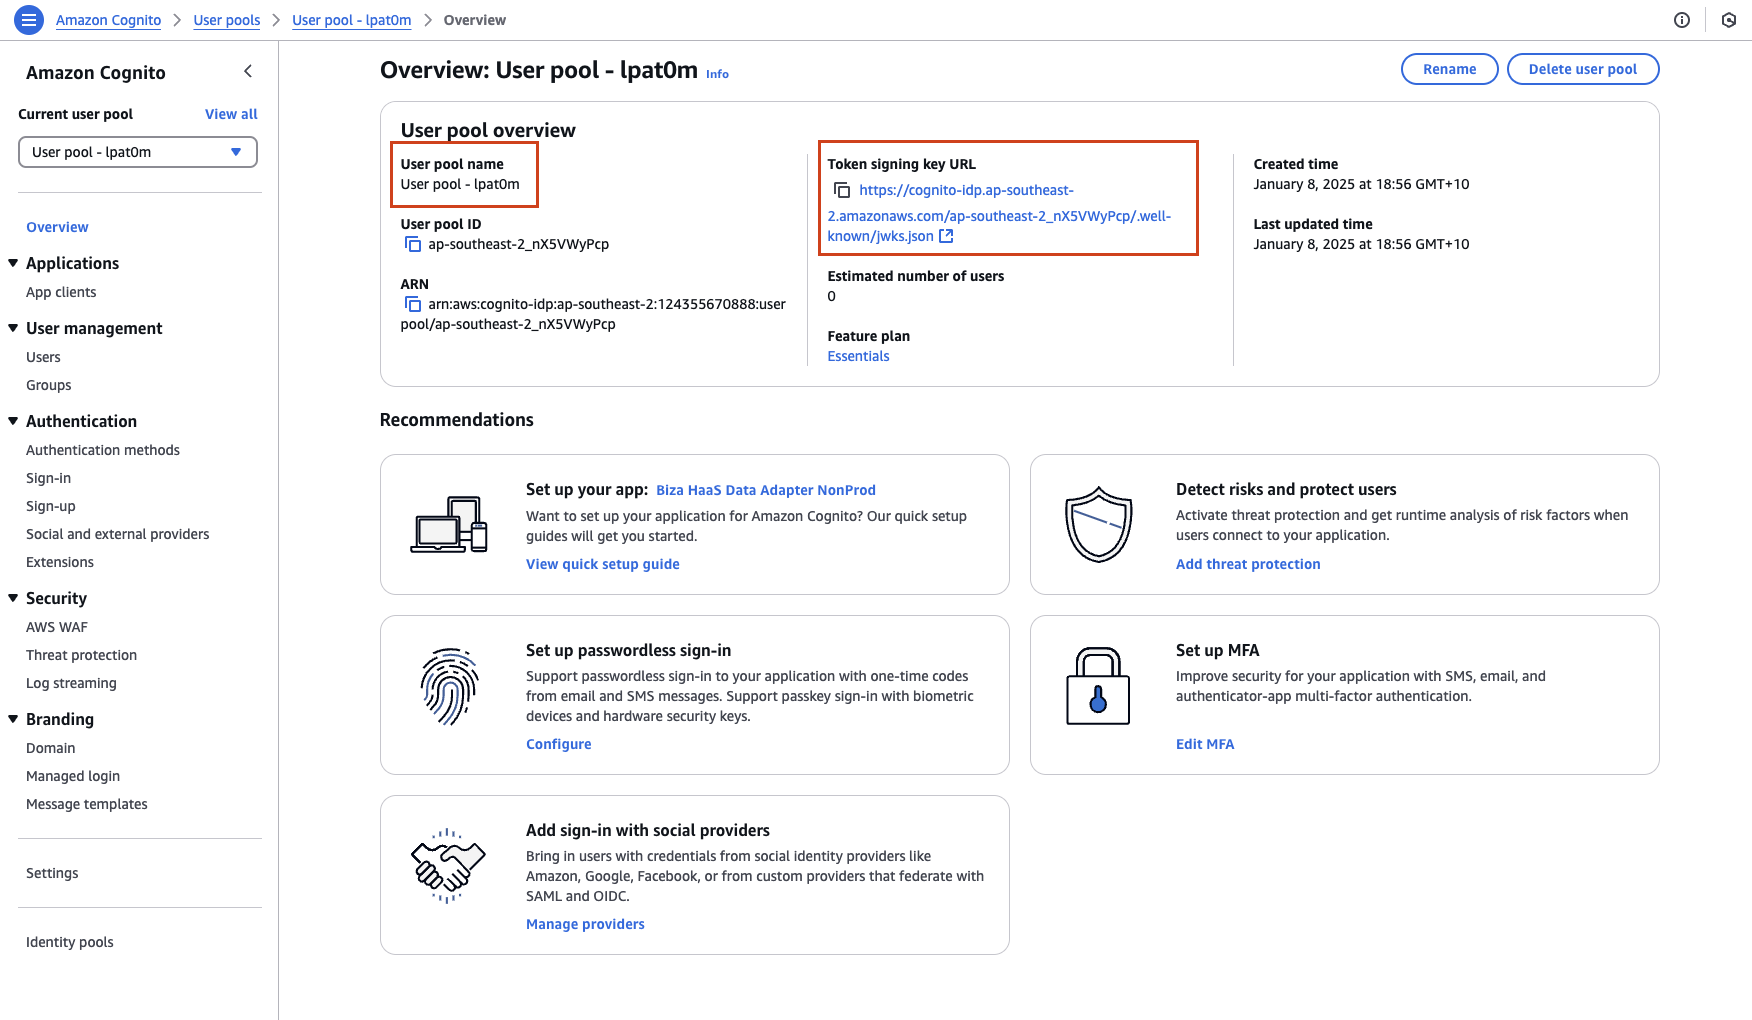
Created User Pool
Collect Client Details
1. Click on the App clients tab of the user pool.
2. Click into the App Client that you set up in the previous step.
3. Copy the Client ID and Client Secret to a safe space to give to Biza.
Client Details
Outputs
Hand these details securely to Biza to set up your OAuth client:
Client ID: (e.g.,353ea493iru313b1drh5pjhiji)Client Secret(e.g.,1fpanlipnqothg74j66s7atok40scjp37viihs5id034u5m5uc11)OAuth Issuer(e.g.,https://cognito-idp.ap-southeast-2.amazonaws.com/ap-southeast-2_nX5VWyPcp/)