AWS Cognito
This guide provides a step-by-step guide for setting up AWS Cognito for your Data Adapter OAuth Issuer.
Prerequisites
Setup
Create a new User Pool
- Navigate to the AWS Cognito console
- Click on the "Create user pool" button.
- Click on the "Machine-to-machine application" application type
- Enter a name for the application (e.g.,
Biza HaaS Data Adapter NonProduction) - Click on the "Create" button.
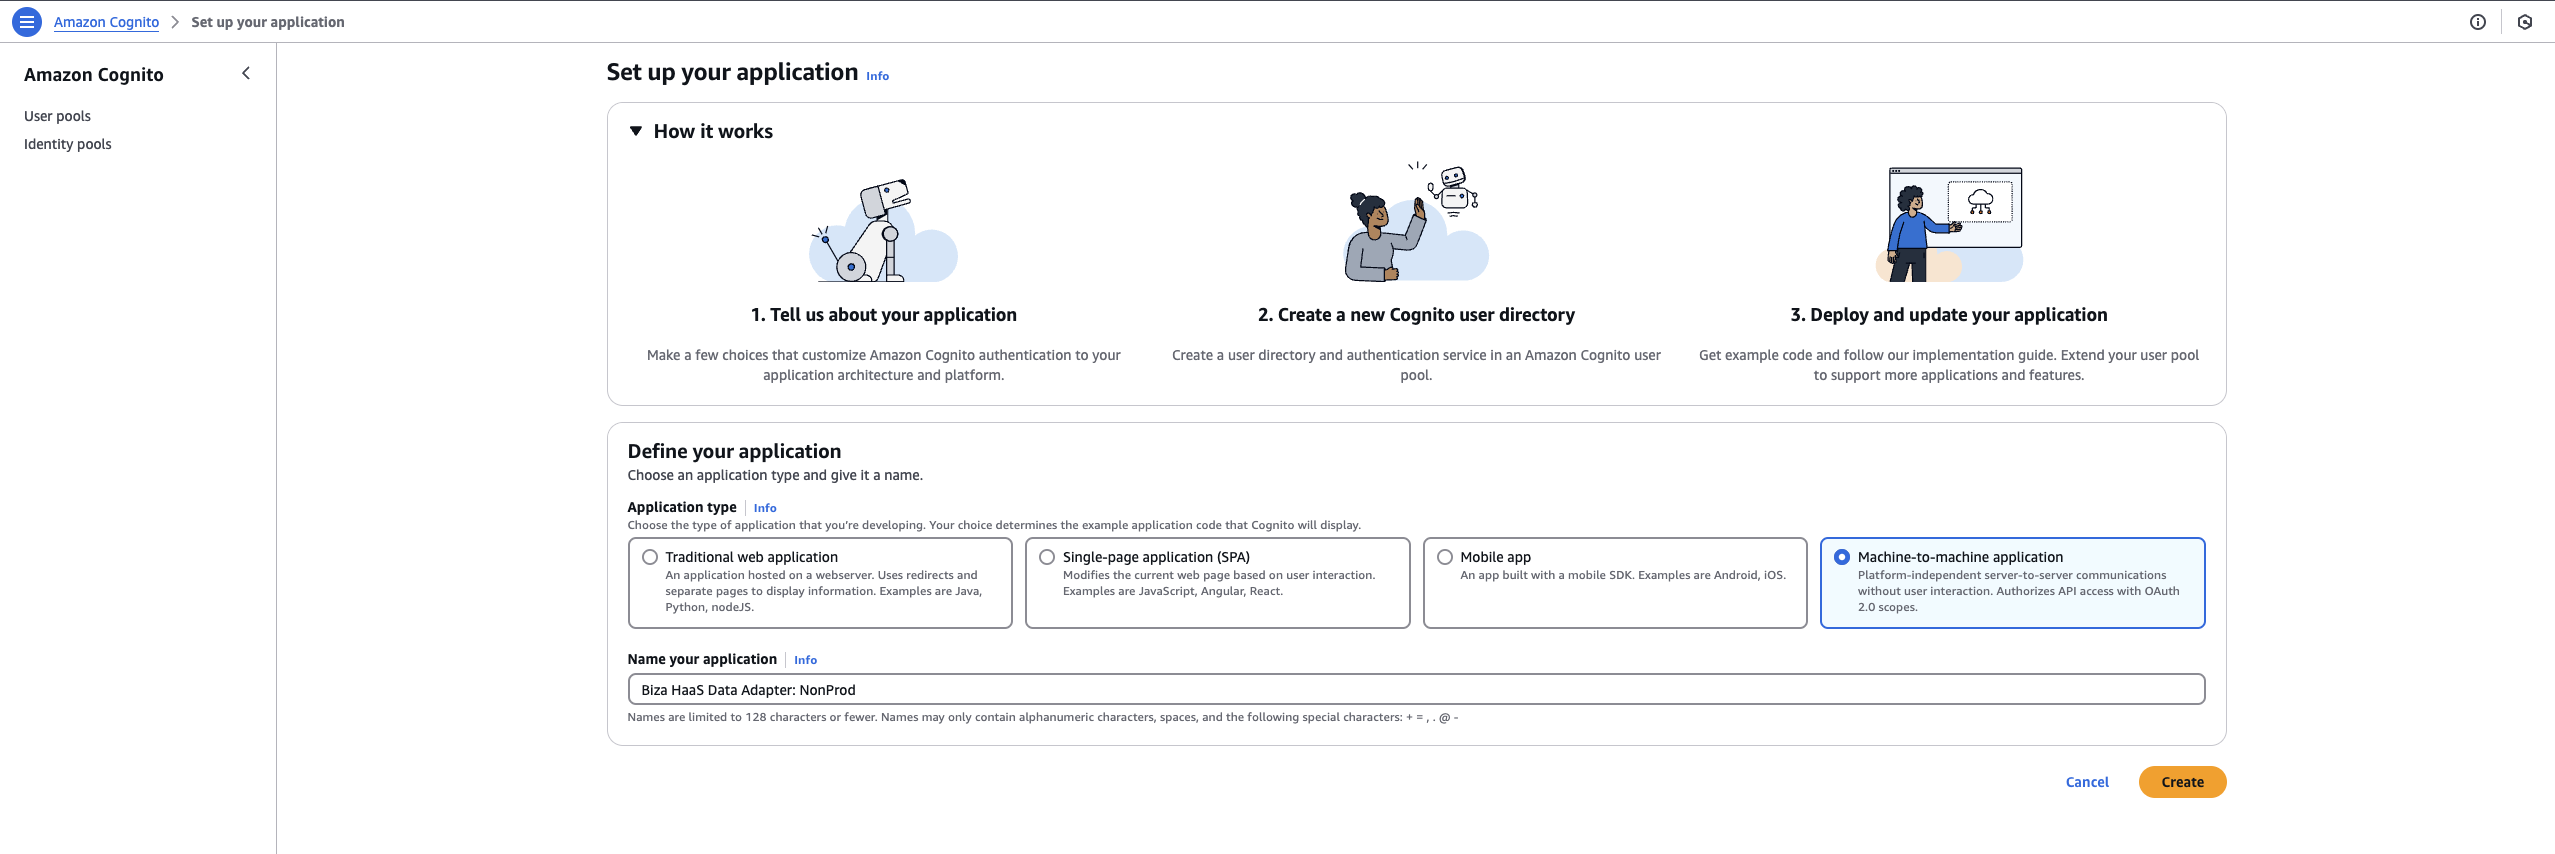
Create Application / User Pool
Collect Issuer Details
- Click on the "Go to overview" button to view the created user pool.
- Note down the
Token signing key URLfrom the user pool but leave out the.well-known/jwks.jsonpart. This is yourOAuth IssuerURL. - You might want to change the name of the user pool to something more descriptive after this process (e.g.
Biza HaaS Data Adapter NonProduction) since it will have a default name ofUser pool - xxxxx.
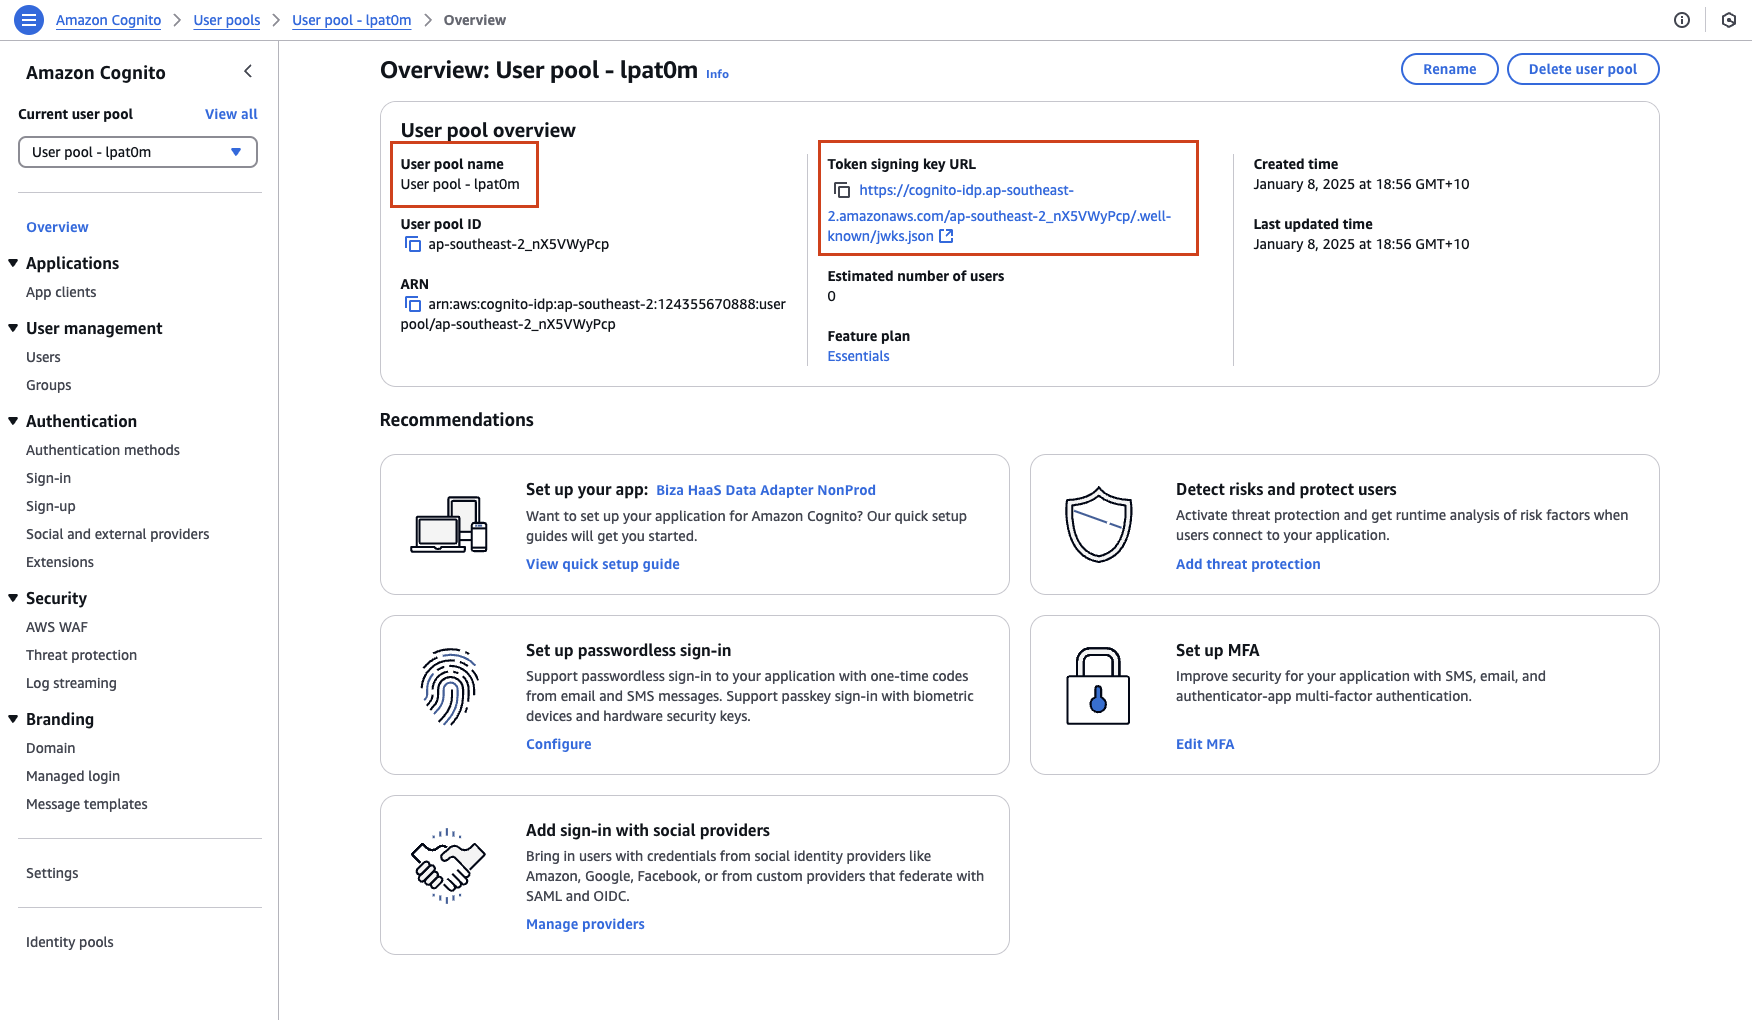
Created User Pool
Collect Client Details
- Click on the
App clientstab of the user pool. - Click into the App Client that you setup in the previous step.
- Copy the
Client IDandClient Secretto a safe space to give to Biza.
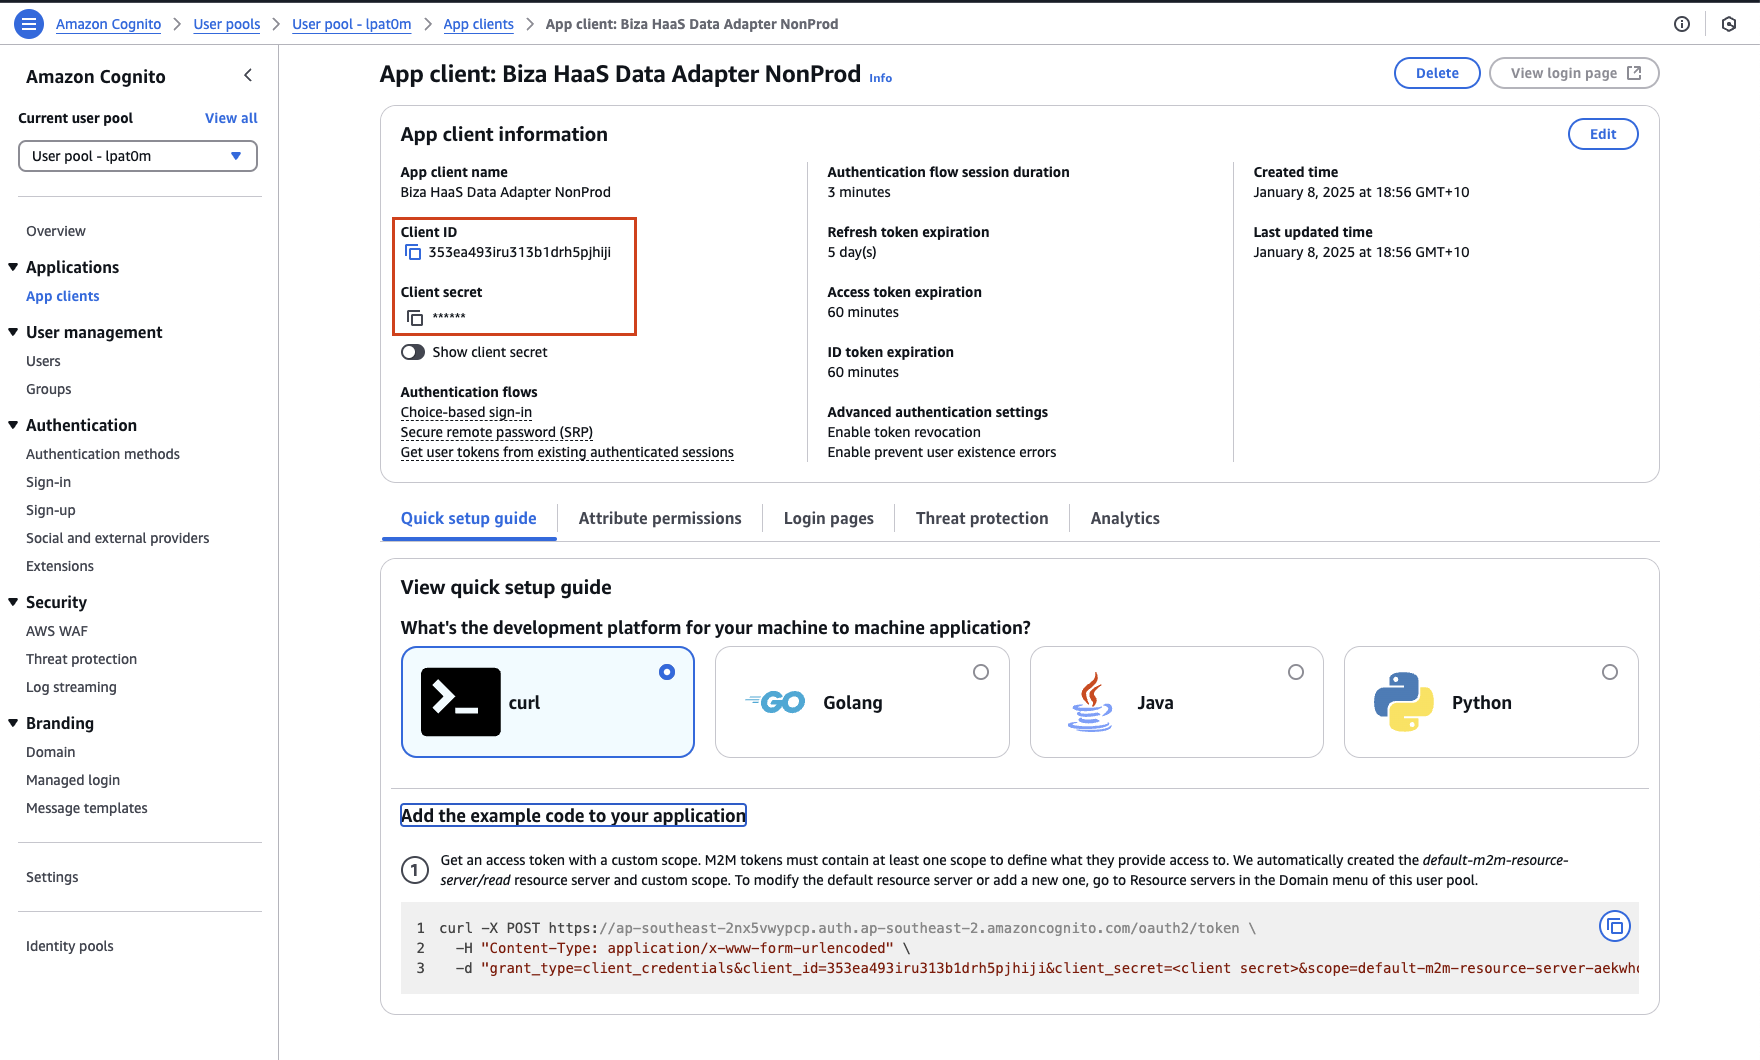
Client Details
Outputs
Hand these details securely to Biza to setup your OAuth client:
Client ID: Eg353ea493iru313b1drh5pjhijiClient Secret(E.g.1fpanlipnqothg74j66s7atok40scjp37viihs5id034u5m5uc11)OAuth Issuer(E.g.https://cognito-idp.ap-southeast-2.amazonaws.com/ap-southeast-2_nX5VWyPcp/)